
Home Page › Discussion Forum › General Windsports Discussion › Boom block lacing
- This topic has 5 replies, 3 voices, and was last updated 6 years, 8 months ago by
 Corey.
-
AuthorPosts
-
-
August 15, 2017 at 6:54 pm #4974
 CoreyParticipant
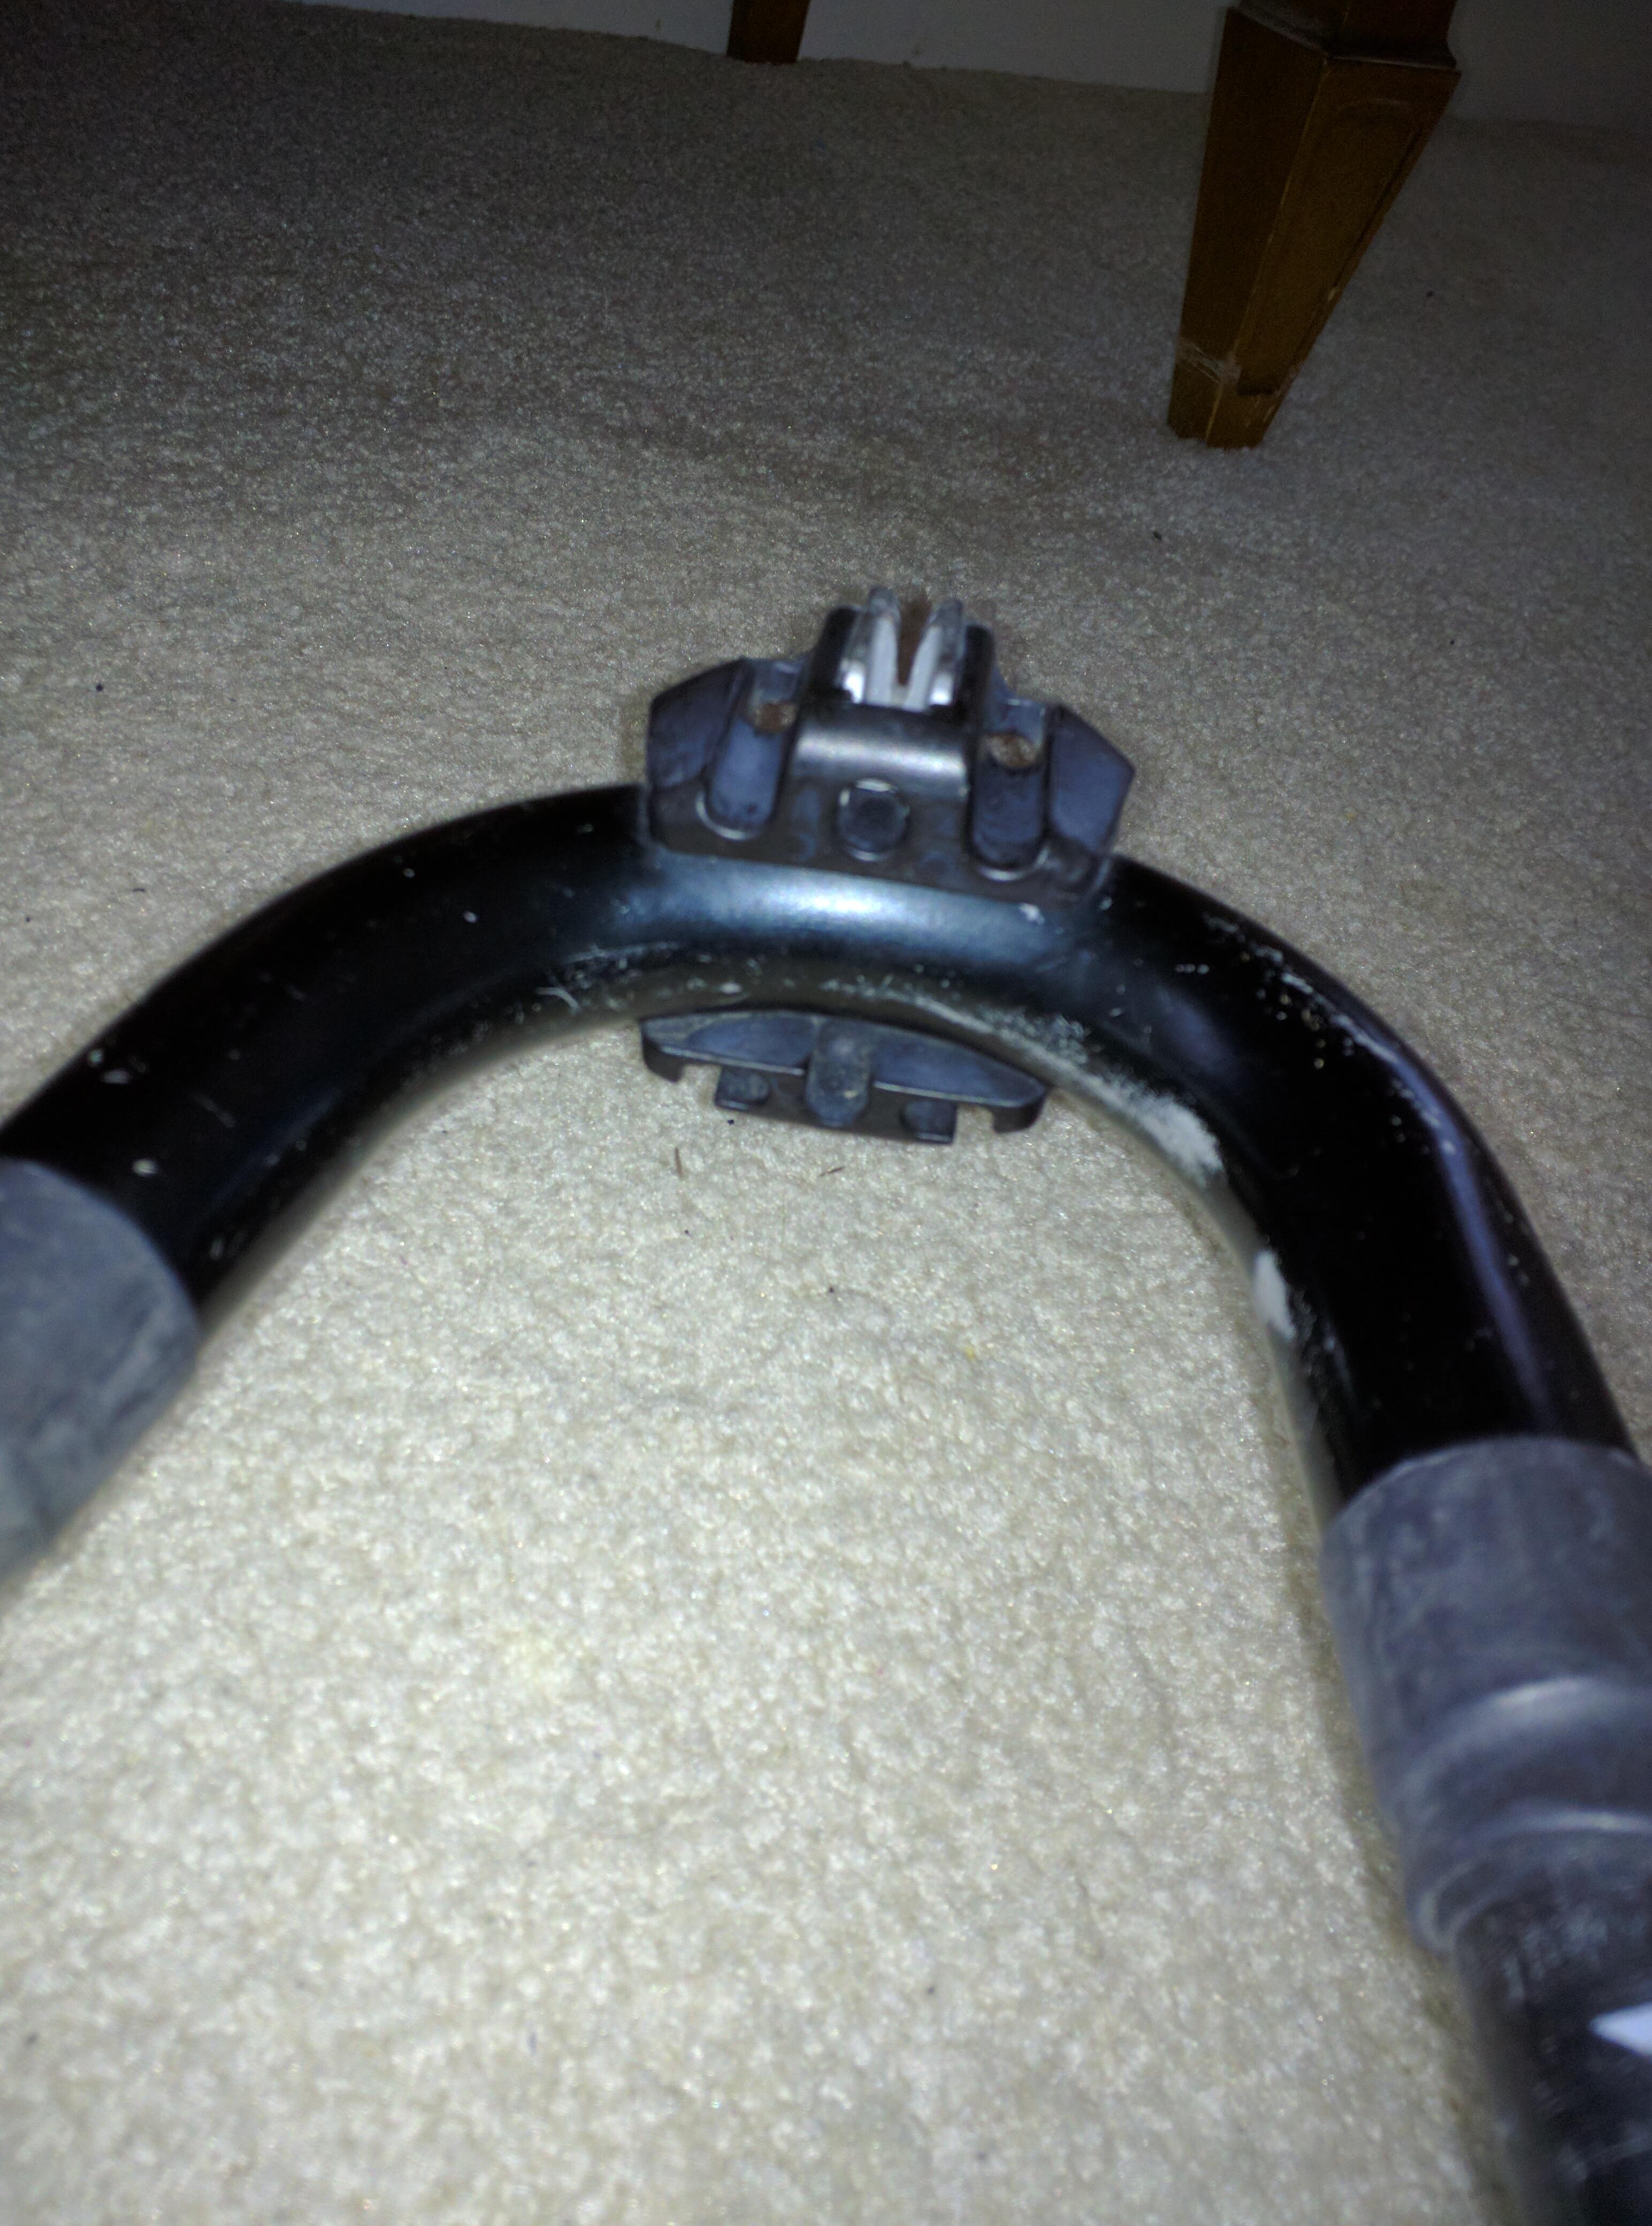
Does anyone have an outhaul block like this? It is an older Neil Pryde boom. If anyone could post a pic so I can figure out how to lace it, I would appreciate it. Thanks
-
August 16, 2017 at 10:11 am #4975
 windydougKeymaster
Hey Corey,
I don’t have an NP boom, but maybe I can help figure it out a bit.
I believe that the 4 matching holes/ cut outs are to be able to rig a sail/boom with an on the fly adjustable outhaul. They make a round insert that goes into the clew grommet and you could loop around that.
I’m going to assume that your rope starts in the bottom center hole below the cleat. I would (from there) run the line through the clew grommet, back to on of the cut outs on the bottom, feed the line around the back of the boom and then back forward (through the other cut out) to the sail on the other side (still on the bottom). Through the grommet and straight to the cleat. In this technique you will not need to use all of the available holes on the boom. Be sure to keep the rope from crossing itself each time you go from boom end to sail grommet.
There is the possibility that as you pass the line behind/around the boom end you may need to cross diagonally from top to bottom or visa versa as in the modern Chinook lacing system seen here:
https://chinooksailing.com/howto
If you are still stuck, take another pic from the back of the block and post it and we should be able to diagnose it quick.
Hope you’ve been getting on the water!
Doug
-
August 16, 2017 at 4:58 pm #4977CoreyParticipant
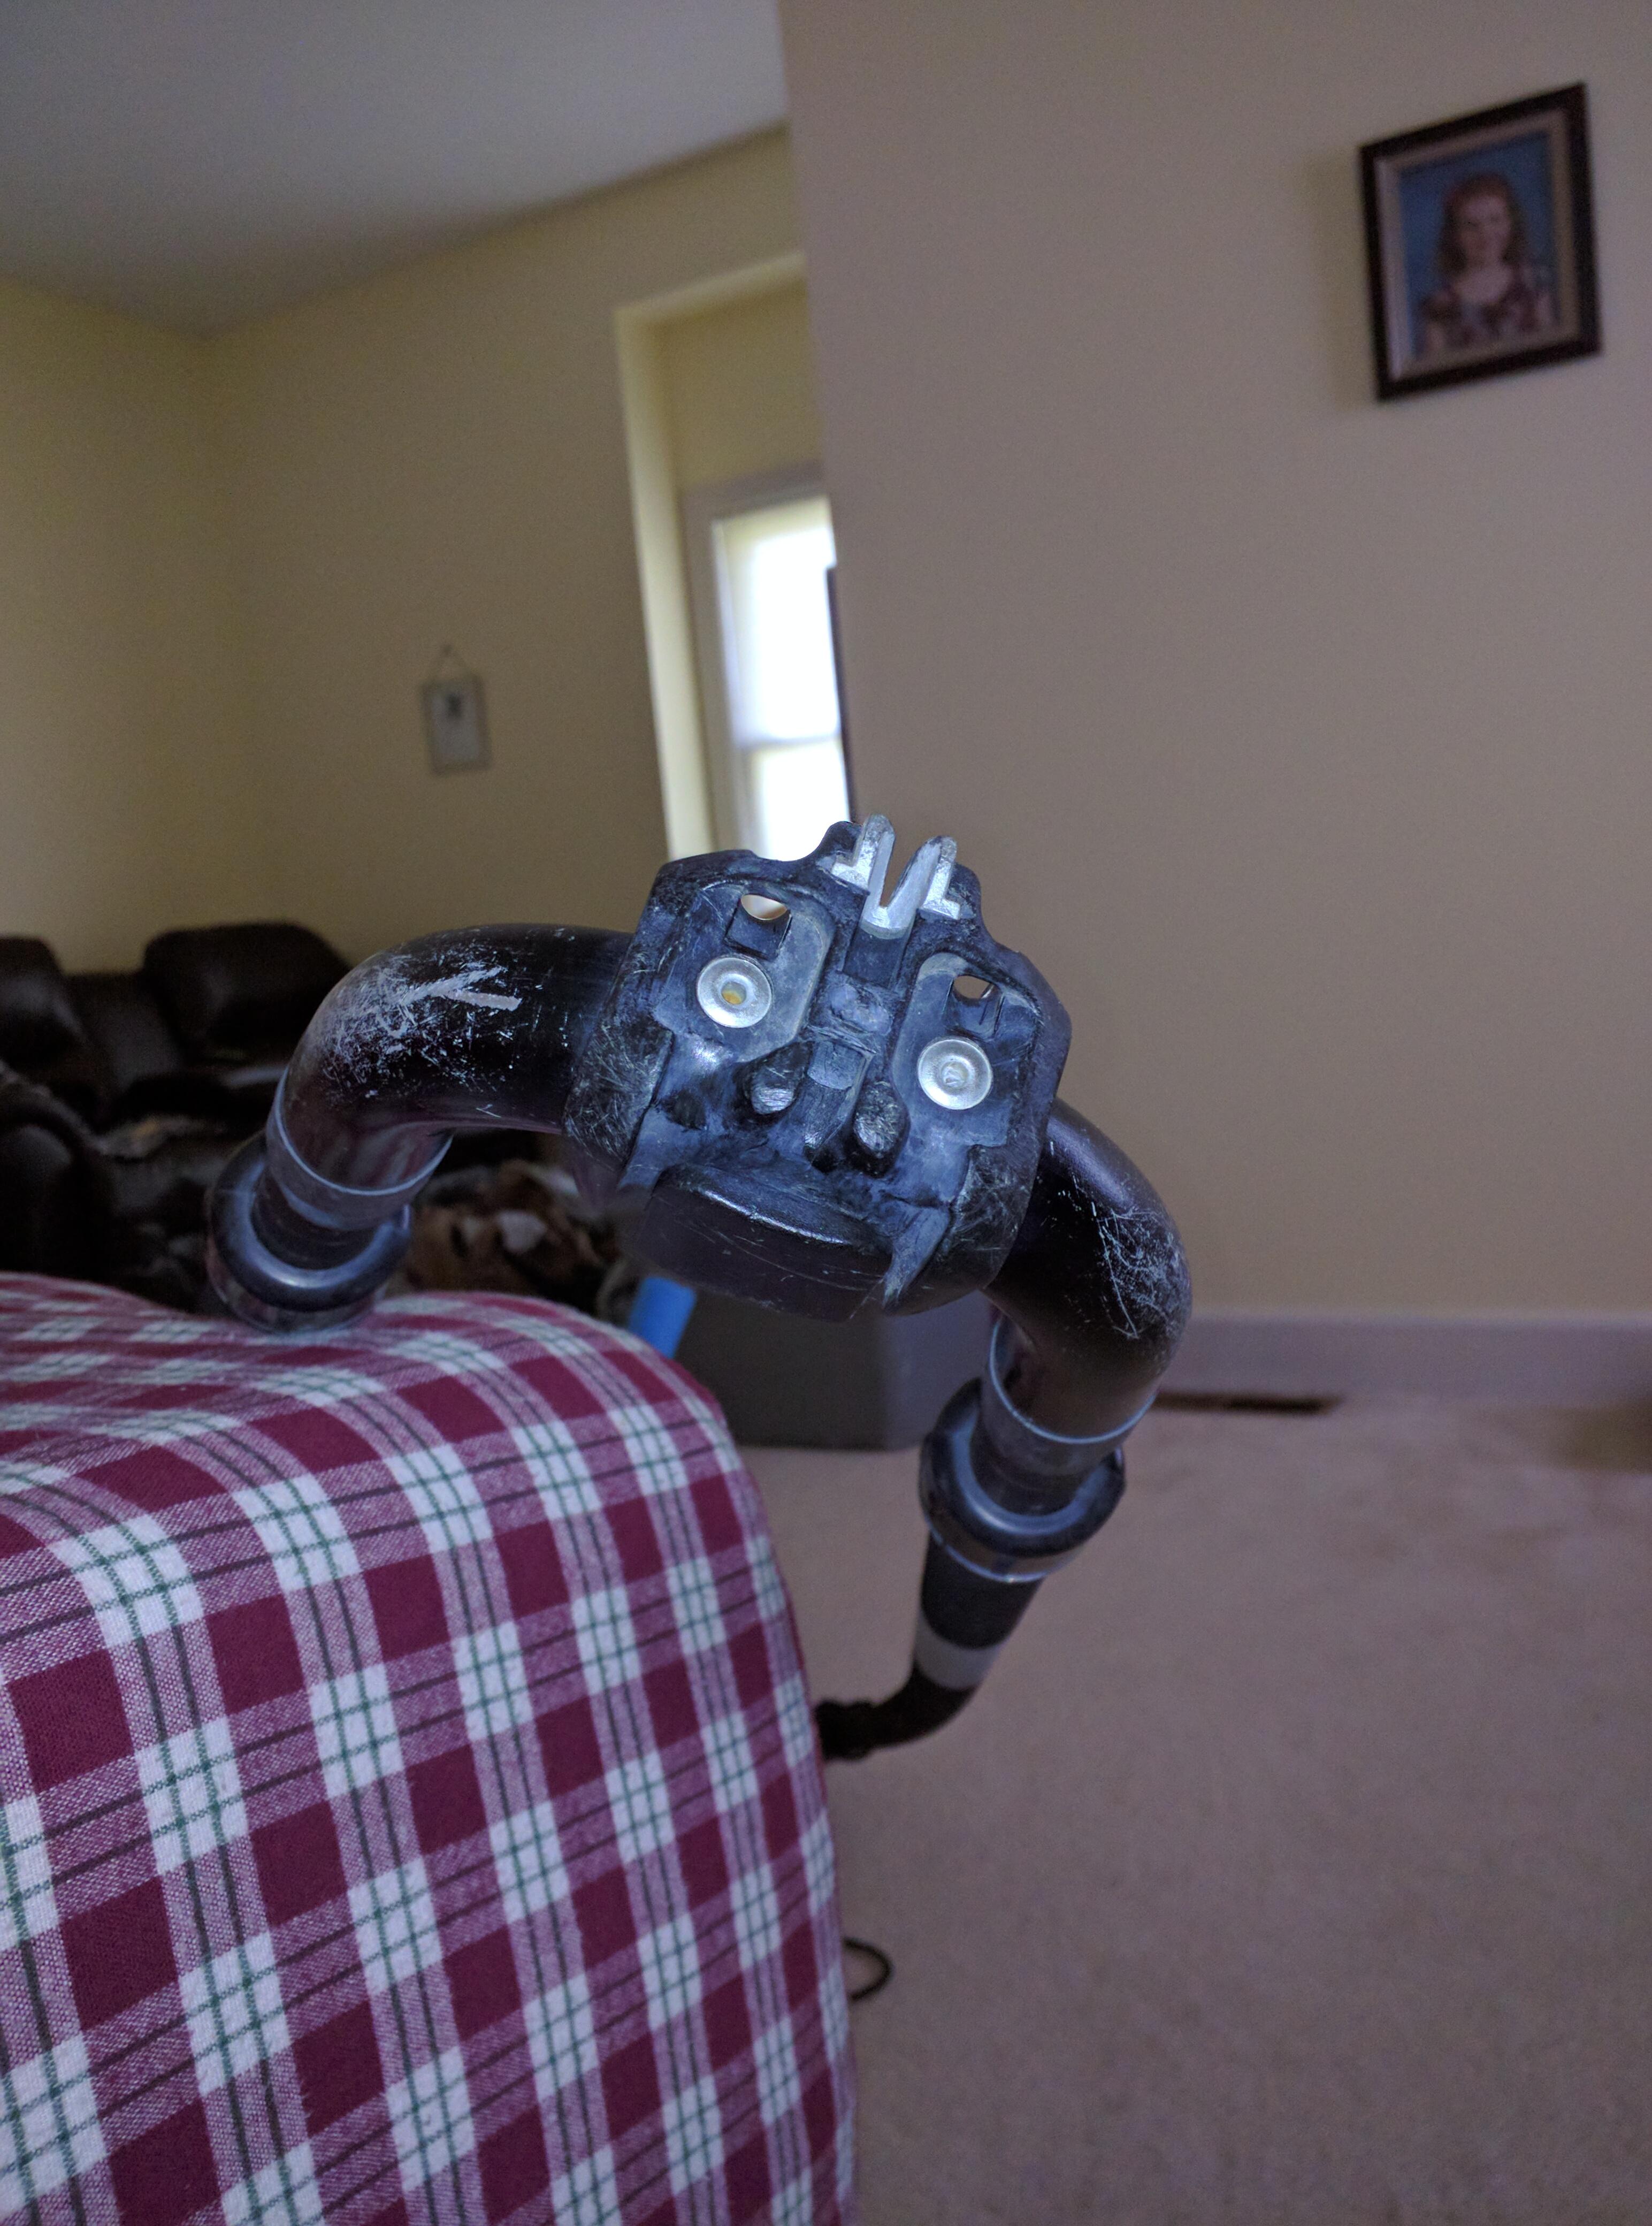
I think you are right, here is a pic of the back while I mull this over.
-
August 17, 2017 at 11:01 am #4978
-
August 18, 2017 at 10:20 am #4980
 GeoffParticipant
1) Tie a figure-of-eight stopper knot in one end of your outhaul line. The reason to use a figure-of-eight rather than an overhand knot is that an overhand knot will get really really tight and be very difficult to untie (one almost never needs to untie this knot, but it’s good nautical practice to use proper knots). Also, a figure-0f-eight is slightly larger, and will thus be less likely to pull through.
2) Insert the line through one of the two holes adjacent to the cleat, which have a bar across the back – this prevents the stopper knot from pulling through.
3) Run the line to the clew grommet, pass it through to the opposite side, back to the clew but on the under side of the tailpiece so that the line loops from the opposite side, through the fairlead path, around the squar-ish blocky protruding thingy (technical jargon), and through the fairlead on the original side but on the under side.
4) Pass the line again through the grommet and back to the clew and through the cleat.
One can get the tackle blocks that insert into the clew grommet, I think I may even have one lurking somewhere…the fact that I’m not using it should be a hint. Adds weight, doesn’t really do much, and if you REALLY want an adjustable outhaul the best way to do it is to tie dinghy micro-blocks the spin freely. Harken makes the right stuff, available at your local sailing chandlery or West Marine.
This old style of clew block leads so slightly assymmetrical tension, so the clew of the sail isn’t perfectly centered. This design was superseded by the Chinook design that Dougie posted a link to. On sails that have 2 clew (or even 3) clew grommets, you can run the line once through each grommet so there is no overlap, and this seems to help a little with the slight asymmetry of line pull.
HTH
-
August 19, 2017 at 8:32 am #4981CoreyParticipant
Thanks Geoff, makes perfect sense. Happy sailing!!
-
-
AuthorPosts
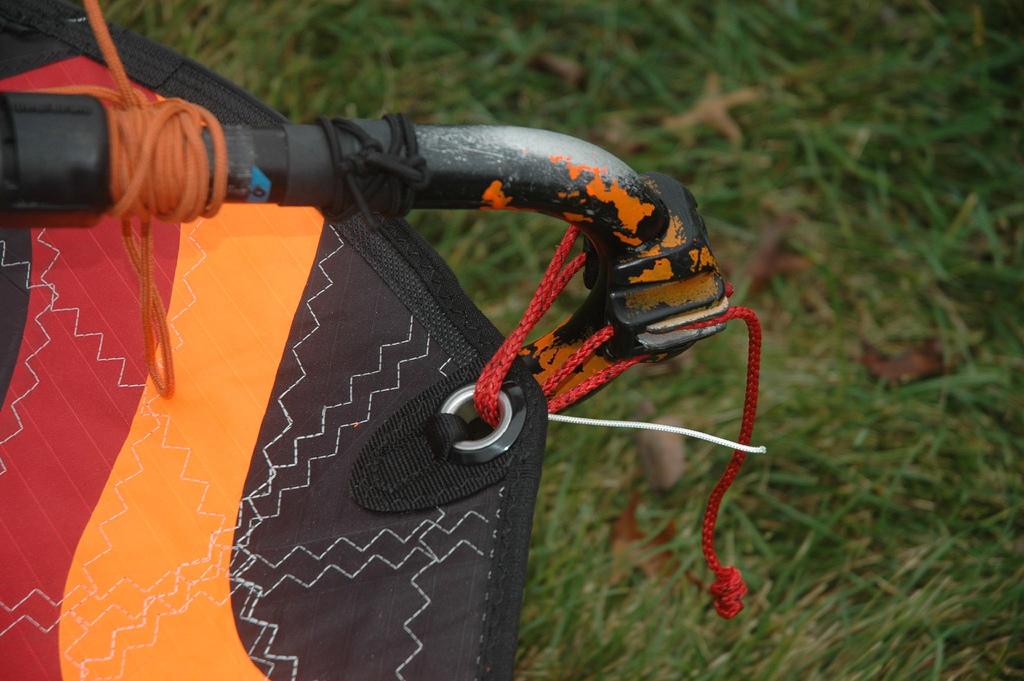 tail piece on a NP boom.
- You must be logged in to reply to this topic.